Employee Management
Access: Click Employees in the sidebar menu Role Required: Admin Only
This section is restricted to administrators. Only Admin users can add, edit, or manage employees.
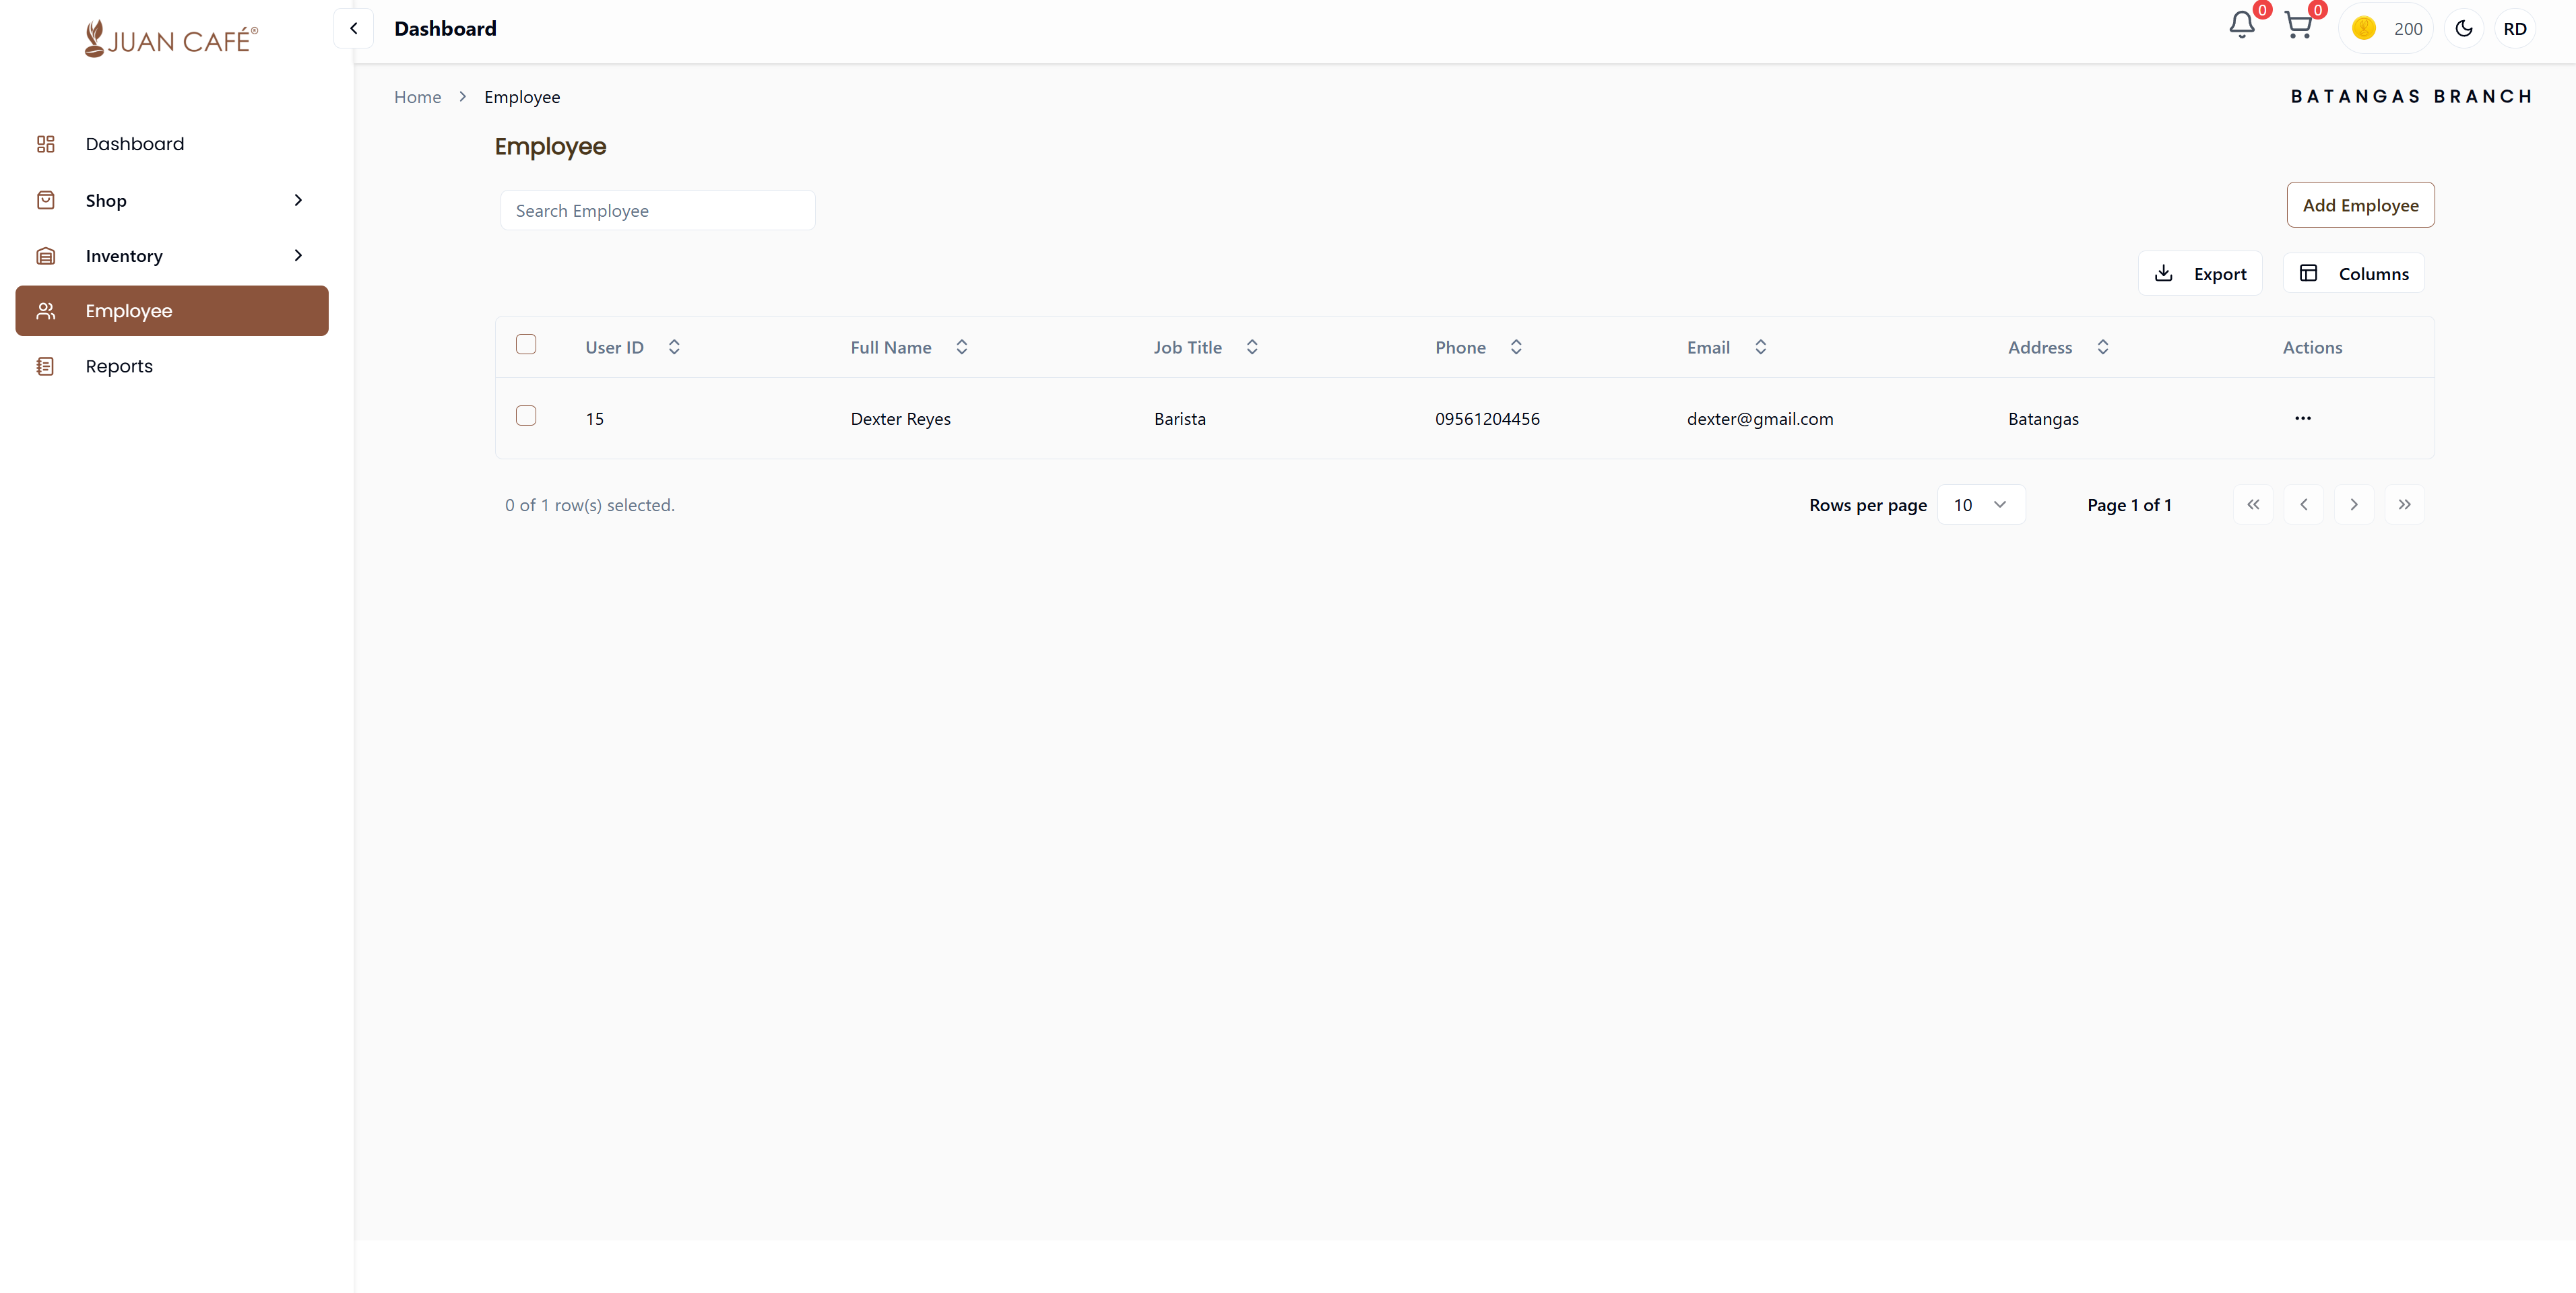
This section is where you manage your branch employees. Manage your franchise outlet's employee records, roles, and information.
Overview
Here's what you can do in this section:
- View Employee List: See details like User ID, full name, job title, phone number, email, and address
- Search Employees: Use the search bar to quickly find an employee
- Add Employee: Click Add Employee to register a new staff member
- Export Data: Download the employee list for record-keeping
- Actions Menu: Edit or manage employee details using the options provided
This page helps you keep your team organized and ensures all employee information is easily accessible.
Add Employee
To add a new staff member to your branch:
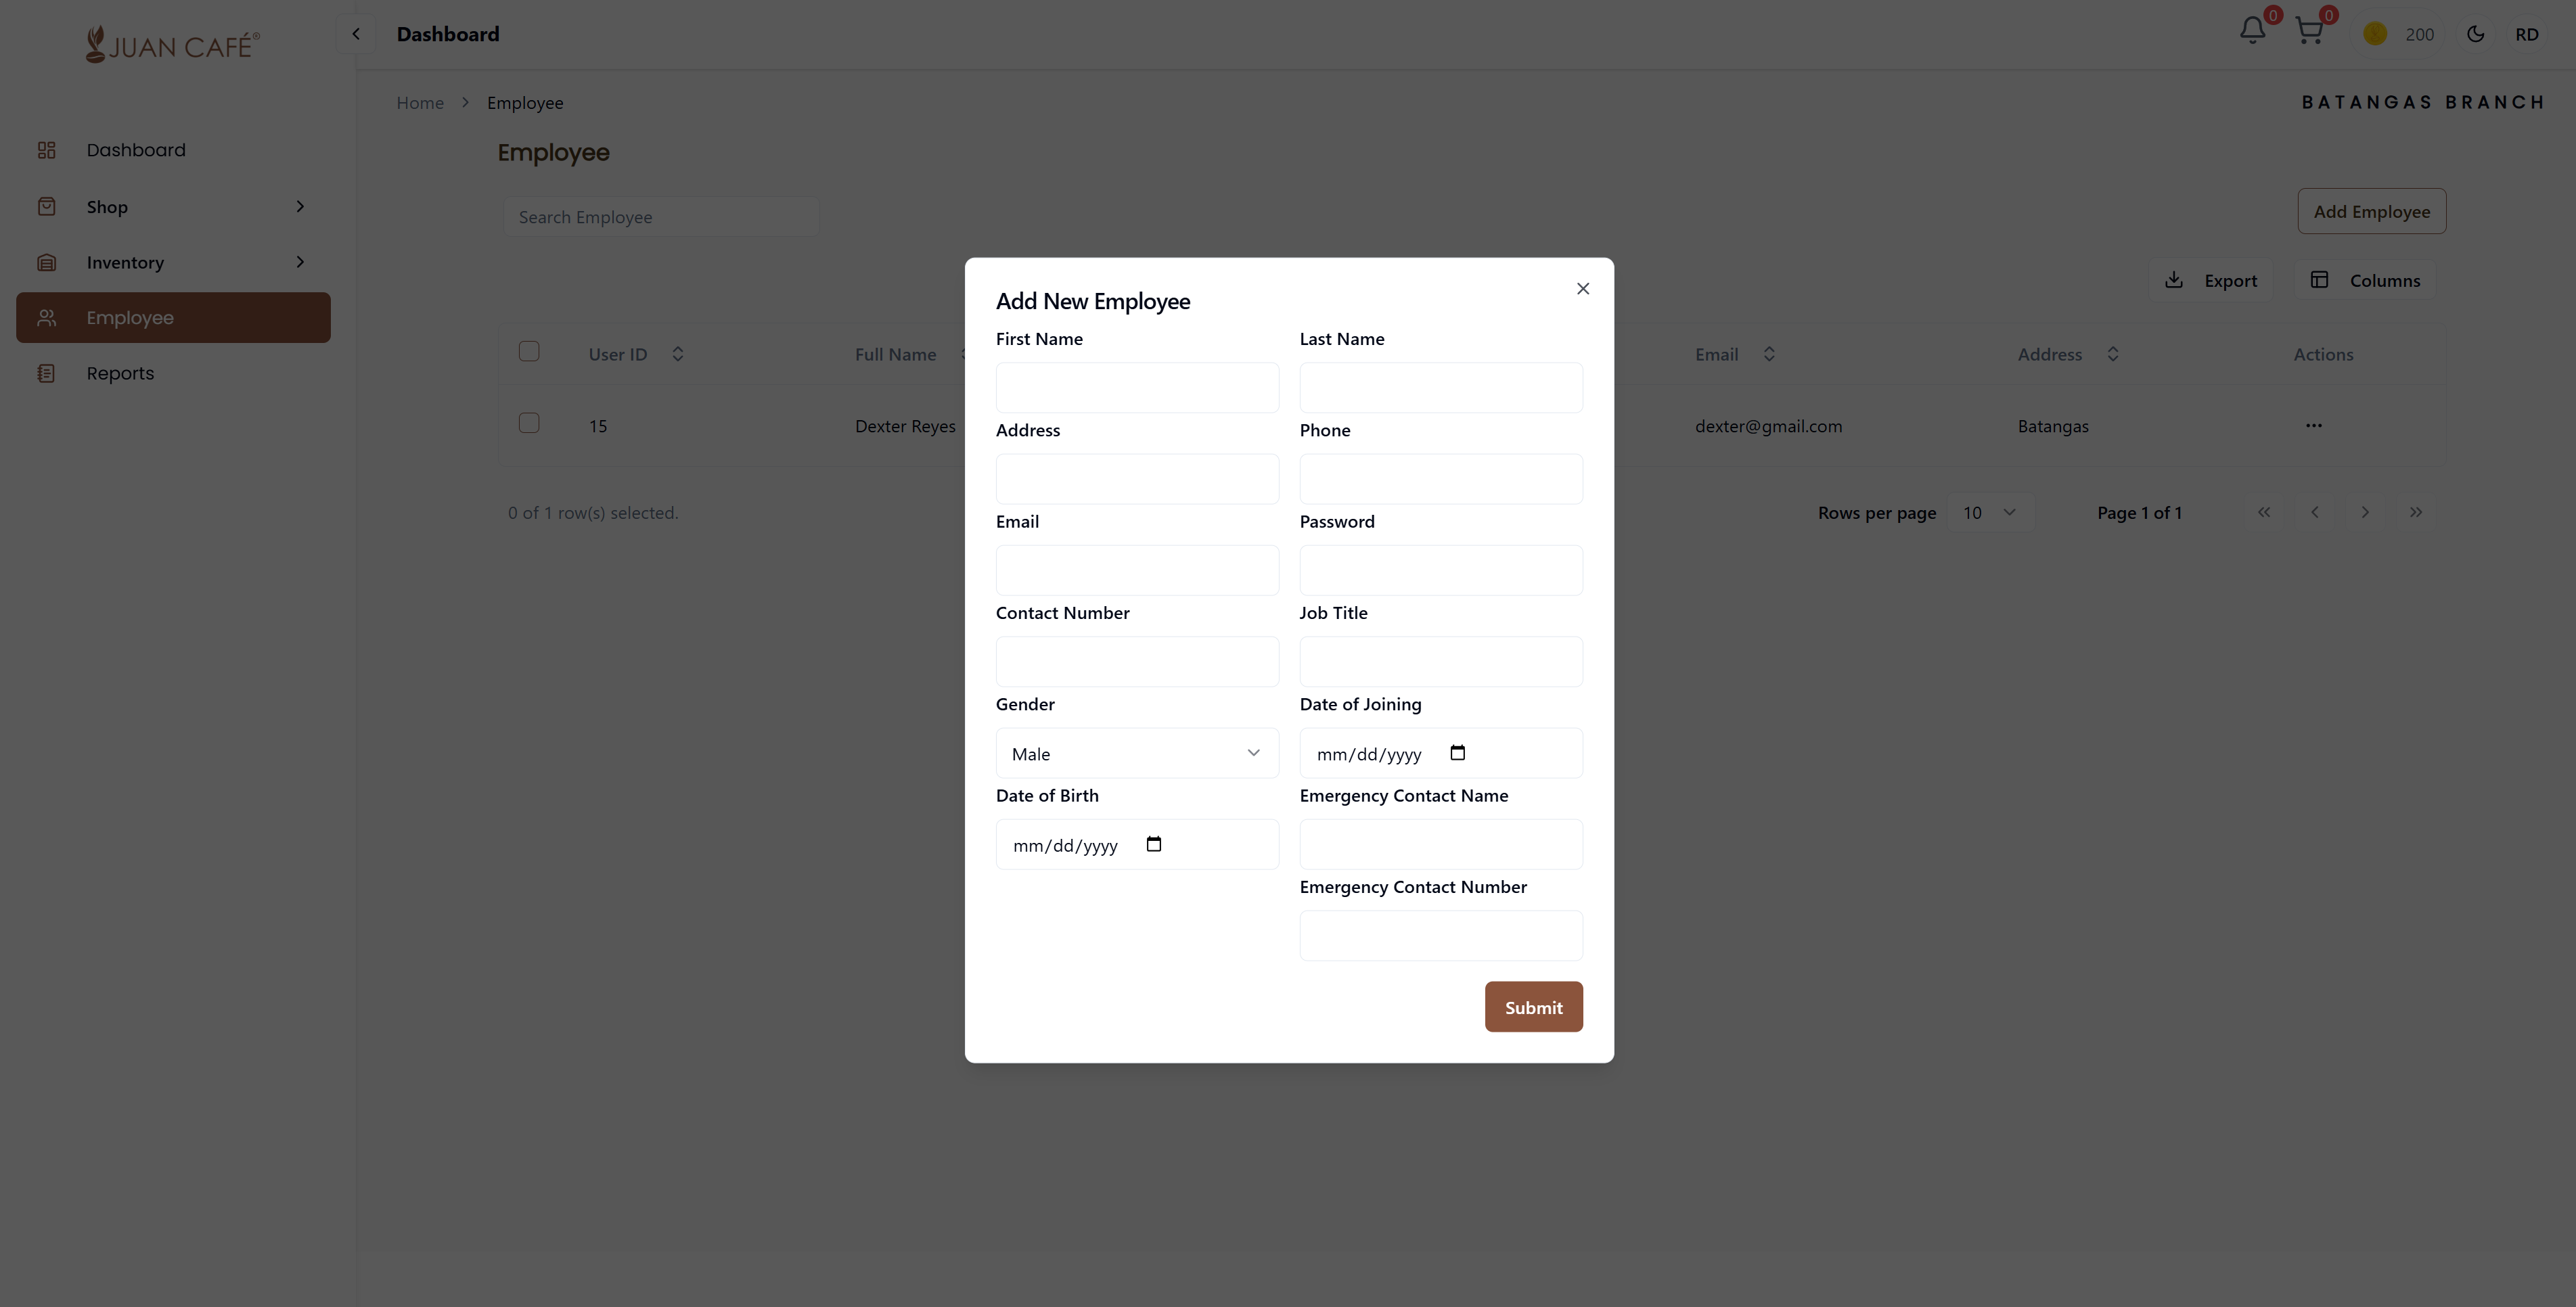
- Click Add Employee button
- Fill in the employee information form completely:
Personal Information
- First Name: Employee's given name
- Last Name: Employee's family name
- Address: Complete residential address including street, city, and province
- Phone Number: Primary contact number (mobile or landline)
- Email: Work email address (will be used for login credentials)
Login Details
- Password: Set a secure password for the employee account
- System will automatically send login credentials to the employee's email
- Employee can change password after first login
Job Information
- Job Title: Position/role in the branch (e.g., Barista, Cashier, Manager, Crew Member)
- Date of Hiring: Employee's start date (use date picker, Format: dd/mm/yyyy)
- Role: System role for access control
- Admin: Full access to all features
- Manager: Limited admin access
- Employee: Basic access for daily operations
Additional Details
- Gender: Select from dropdown (Male, Female, Other)
- Date of Birth: Use date picker (Format: dd/mm/yyyy)
Emergency Contact Information
- Emergency Contact Name: Full name of emergency contact person (family member or close friend)
- Emergency Contact Number: Direct phone number to reach emergency contact
- Review all information carefully for accuracy
- Click Submit to save the new employee record
After Adding
- Employee record is created in the system
- Employee receives login credentials via email automatically
- They can access the system based on their assigned role
- Employee appears in the employee directory table
- You can edit employee details anytime if needed
This form ensures all employee details are properly recorded for easy management. Make sure all information is accurate, especially email and emergency contact details.
Edit Employee Information
To update existing employee records:
- Locate the employee in the Employee table
- Click Actions (⋮) > Edit Details
- Update any of the fields:
- Personal information
- Contact details
- Job title or role
- Emergency contact information
- Click Update
What Can Be Edited
- All personal information fields
- Employment details (job title, role)
- Contact numbers and email
- Emergency contact information
What Cannot Be Edited
- Employee ID (system-generated)
- Date of joining (historical record)
- Username (tied to email)
Employee Roles
The system has three role levels with different access permissions:
Admin
- Full system access
- Can manage employees
- Can approve orders
- Can process payments
- Can manage all inventory
- Can view all reports
- Can access sales reporting
Manager
- Similar access to Admin
- Can view and manage inventory
- Can access reports
- Can view orders
- Cannot add/remove employees
- Limited payment management
Employee
- Limited access
- Can view inventory (read-only)
- Can browse shop and place orders
- Can view assigned tasks
- Cannot manage employees
- Cannot approve orders or payments
- Cannot access financial reports
Managing Employee Directory
- Search Employees: Use search bar to find by name or email
- Filter by Role: Filter table by role type
- View Details: Click Actions (⋮) > View to see complete employee profile
- Delete Employee: Remove employee record (requires confirmation)
- Deleted employees lose system access
- Historical records are preserved
Best Practices
- Assign appropriate roles based on job responsibilities
- Keep emergency contact information up to date
- Review employee access periodically
- Update contact details when changed
- Deactivate accounts for employees who leave
Assign roles carefully based on job responsibilities to maintain system security and data integrity.